
Halloween is one of our favorite times of the year at The Lodge, and pumpkin carving is one of our favorite traditions!
Maybe we’re perfectionists, but we take the art of pumpkin carving very seriously. While throwing a pumpkin on your kitchen table and going to town with a knife may seem sufficient, several foolproof tips and tricks can take your pumpkin from “good enough” to contest-worthy!
Here’s everything you need to know about how to carve the perfect pumpkin.
1. Pick the Perfect Pumpkin
The pumpkin carving journey starts with selecting the most prime pumpkin from the patch! We find our favorites at Antheia of Chelan, just a five-minute drive from The Lodge into the hills of Manson.
Antheia of Chelan has many fun, family-friendly activities planned each weekend of October, including hay rides, apple shoot, pumpkin picking, and u-pick flowers while they last!
To find the perfect carving pumpkin, look for a medium to large-sized pumpkin free from bruises, with a nice, sturdy stem and a flat bottom for easy handling and display.
Consider that the size and shape of the pumpkin lend itself to certain features and designs. A tall, narrow pumpkin could make for a great elongated face, or you could turn warts and bumps into other facial features!
2. Plan Your Design
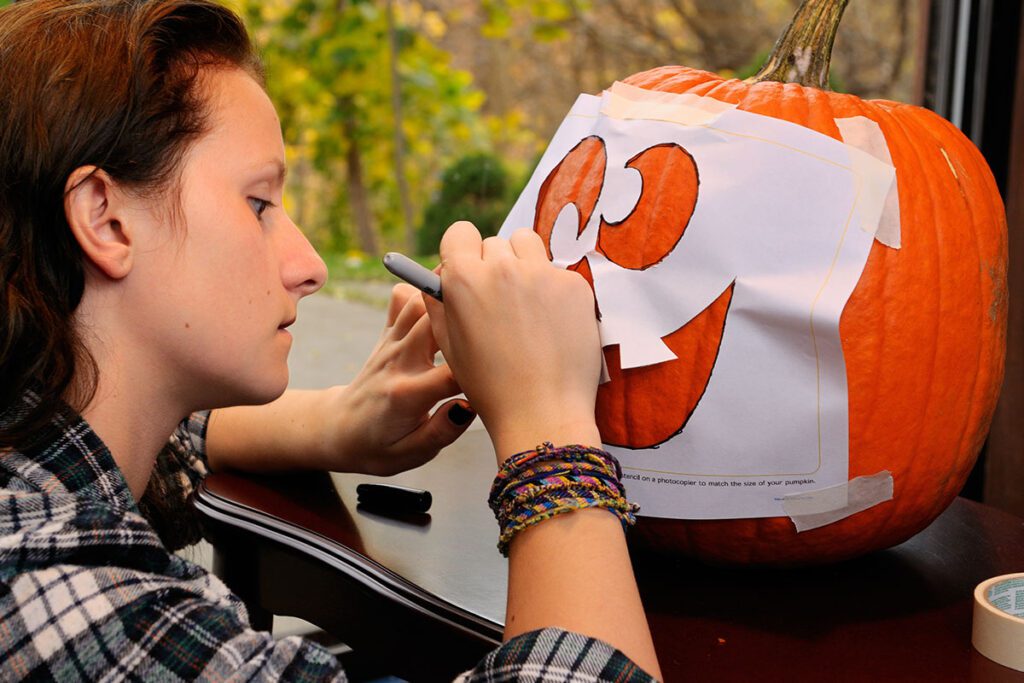
While some people may thrive on free-handing their carving (more power to them!), we prefer to err on the side of carefully tracing our design before making the first cut.
If you’re feeling confident, you can draw your own design directly on your pumpkin with a Sharpie or felt-tipped pen. Alternatively, some great pumpkin carving stencils are online, ranging from cute and simple to frightening and advanced! Here is a link to 49 free printable pumpkin stencils from Good Housekeeping to get you started.
You can also create your own stencil by sketching your design on paper and then attaching the design to your pumpkin.
We recommend affixing your stencil to the pumpkin with pins rather than tape, as they’ll stay put much better!
And remember, the more intricate the design, the longer the carving will take. You may want to select your design based on how much time you’re willing to spend on it.
3. Set Up Your Carving Station
Next up, it’s time to prepare your carving station!
The first step is to gather all the necessary tools and materials. Here’s a list to get you started:
- Knives (serrated kitchen knives or X-acto knives work well) and other carving implements, such as a pumpkin carving kit
- Large metal spoon or spork to scoop out the seeds and “guts”
- Newspaper or cardboard to lay down on your carving surface
- Paper towels to wipe down your pumpkin as needed
- Two large bowls – one for seeds and one for the guts
- Large garbage can to dispose of any mess
- Pens and pencils in case you need to retrace your design
- Stencil or blank paper for design
- Pins to attach your stencil to the pumpkin
- Petroleum Jelly
- Candles or battery-powered votive candles
- Pumpkin
First, we set down cardboard or newspaper across the carving station. The last thing you want is to damage a favorite kitchen or dining table with knife marks or stains!
Then, we lay out all of our materials on the table, including knives and carving kits, spoons, bowls, paper towels, pens, pencils, stencils, pins, and last but not least, your pumpkin!
4. Practice These Foolproof Carving Techniques
Now that you’re all set up, it’s time to get carving! Here are a few tips and tricks to really take your design to the next level.
- Cut your pumpkin from the bottom, not the top. By cutting out your “lid” from the bottom, you help prevent the sides from caving in later. If you decide to cut from the top, then be sure to cut the lid at an angle so it doesn’t fall into your pumpkin.
- Cut a “chimney” into the top of the pumpkin (or lid). If you decide to light your pumpkin with candles, this will help smoke escape.
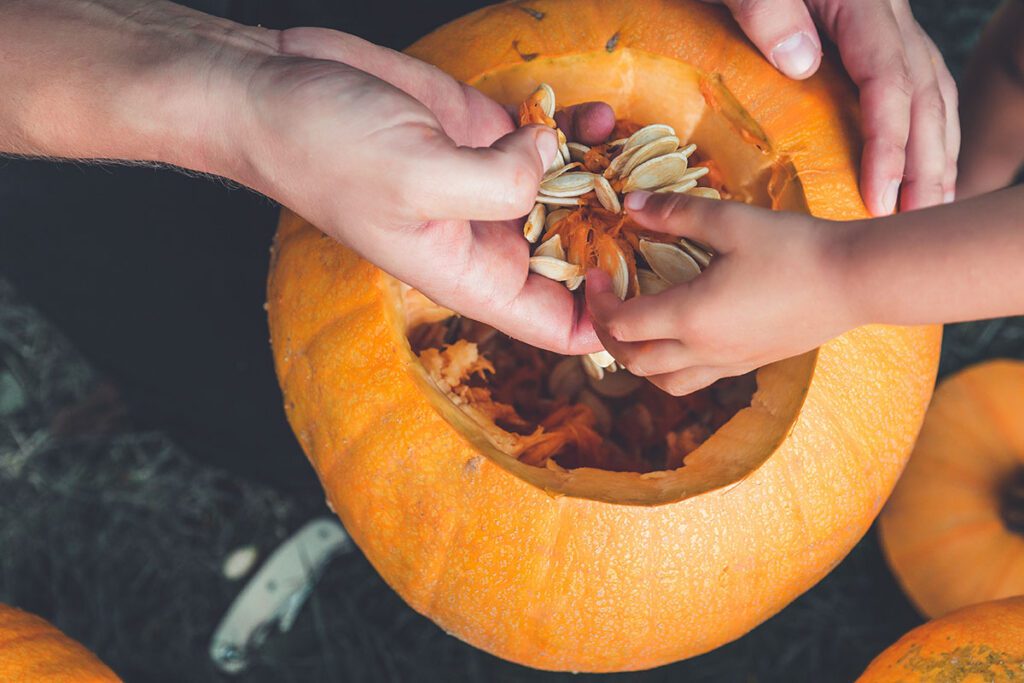
- Scoop out all of the insides and save the seeds! This is where your large bowls come in handy. As you remove your pumpkin’s innards, divide the seeds into one bowl and the guts into the other. Once you’ve thoroughly scraped out the pumpkin (get every inch you can!), set aside your seeds for baking. It’s one of the best parts of the pumpkin carving process! Here’s a recipe to get you started.
- After attaching the stencil to your pumpkin, trace the design by poking small holes into your pumpkin with a fork, pencil, or pin. After you’ve traced the entire design, you can remove the stencil and use the holes as a guide.
- Hold the pumpkin in your lap. This gives you better leverage and precision. We prefer a serrated kitchen knife or an X-acto knife for carving since they are easier to handle. Remember to exercise caution while carving, and don’t allow little ones to carve unsupervised!
- Use up-and-down slices rather than carving on a slant. This creates cleaner lines.
- Start with larger cuts first, then move on to the smaller or more precise cuts. You can always go back and clean up the lines as needed.
- Preserve your pumpkin by spreading petroleum jelly on the cut edges. This helps lock in moisture and ensure your pumpkin lasts longer in the elements.
And just like that, you’ve carved a perfect pumpkin! Now you can insert your candle (tip: a battery-powered votive is safer and won’t erode your pumpkin as quickly as an active flame) into your pumpkin and have the satisfaction of seeing how your design looks lit up against a broody, October night sky.
Visit the Lake Chelan Valley this October

With dazzling autumn colors, wine harvest activities, and plenty of family fun across Manson and Chelan, there are so many great reasons to visit the Lake Chelan Valley this October!
The Lodge is happy to be your home away from home, a place where you can plot out the perfect fall visit with the help of our friendly front desk staff or cozy up by our outdoor firepits with some hot cocoa after an action-packed day!
Book online or give us a call today to reserve your fall stay at the Lake Chelan Valley. We look forward to hosting you!